This post may contain affiliate links. Please read my disclosure and privacy policy.

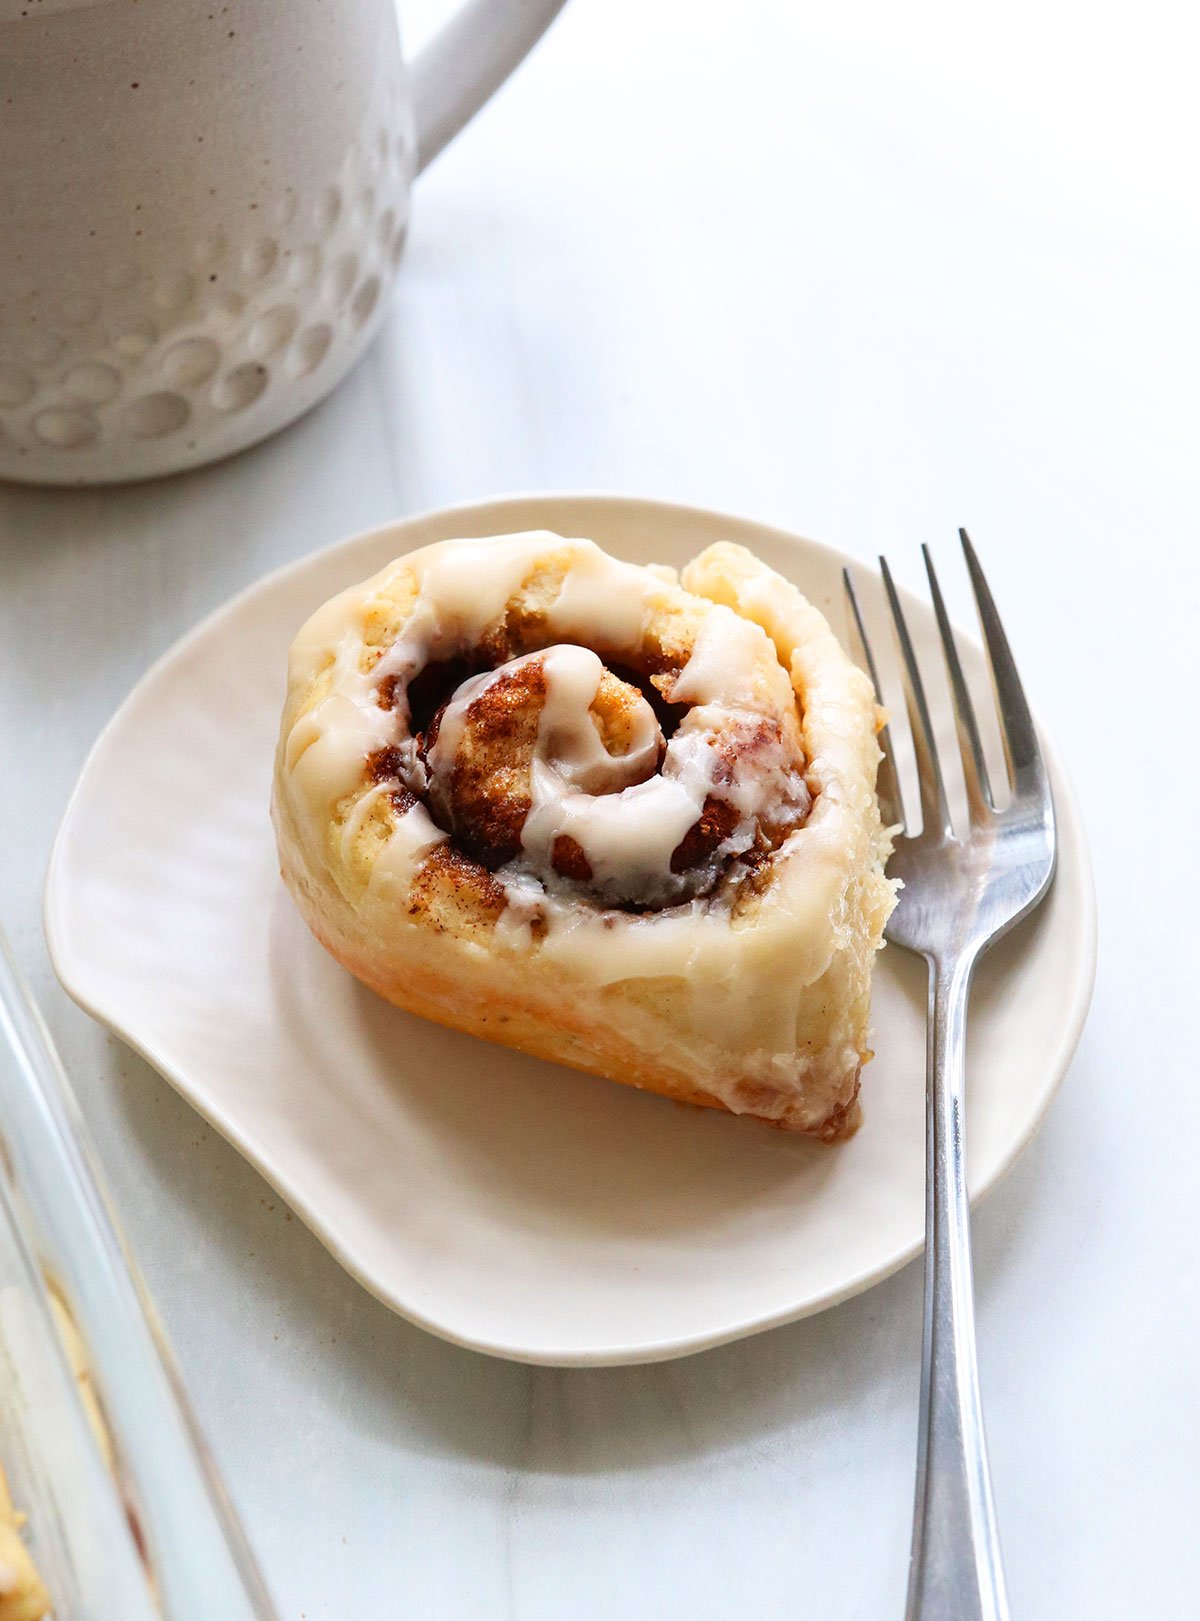
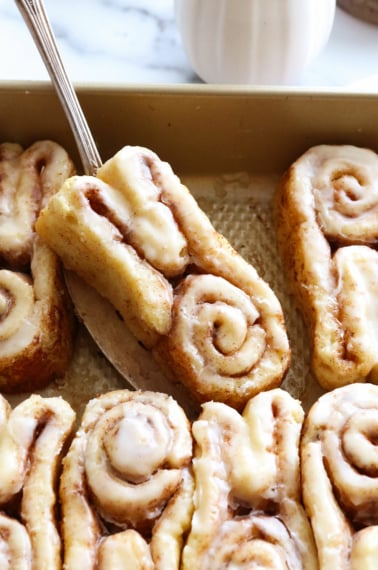
These Gluten-Free Cinnamon Rolls are the best you’ll ever make. (Seriously!) They have a tender texture, just like the traditional version, only without the gluten.
Why You’ll Love Them
- They have an authentic texture. Gluten-free flour blends tend to create a cinnamon roll with the texture of a biscuit or scone because they lack the elasticity that gluten provides. However, you can fix this with a magic ingredient: psyllium husk! (More details below.)
- They rise like traditional rolls. These gluten-free cinnamon rolls will grow in size and fill the pan, just like traditional recipes do. They also have extra soluble fiber in each bite, so that’s a bonus.
- They taste amazing! Since cinnamon rolls tend to be a special holiday treat, I’m sharing all the tricks for making them taste better than the ones you’d buy from a bakery. This includes a caramelized base and a melt-in-your-mouth powdered sugar frosting, but I’ve also included options in the notes if you prefer to avoid using refined sugar. (We make them with brown sugar and melted butter for Christmas morning.)
- They are tested and perfected. If you’ve been disappointed by other gluten-free cinnamon roll recipes, this is the recipe for you. I’ve tested over 30 batches of cinnamon rolls to ensure they are the best in taste and texture. Just be sure to use the exact ingredients called for, and read the substitution notes if you need to make them dairy-free or vegan.
Ingredients You’ll Need
For this recipe to work, you’ll need to use a gluten-free flour blend that includes xanthan gum. I recommend using Bob’s Red Mill 1-to-1 Baking Flour (affiliate link) since that’s what I tested this recipe with.
Active dry yeast will help the cinnamon rolls rise, but you can skip the “proofing” step at the beginning if you need to use instant yeast instead. In that case, just add the warm water and yeast directly to the dough.
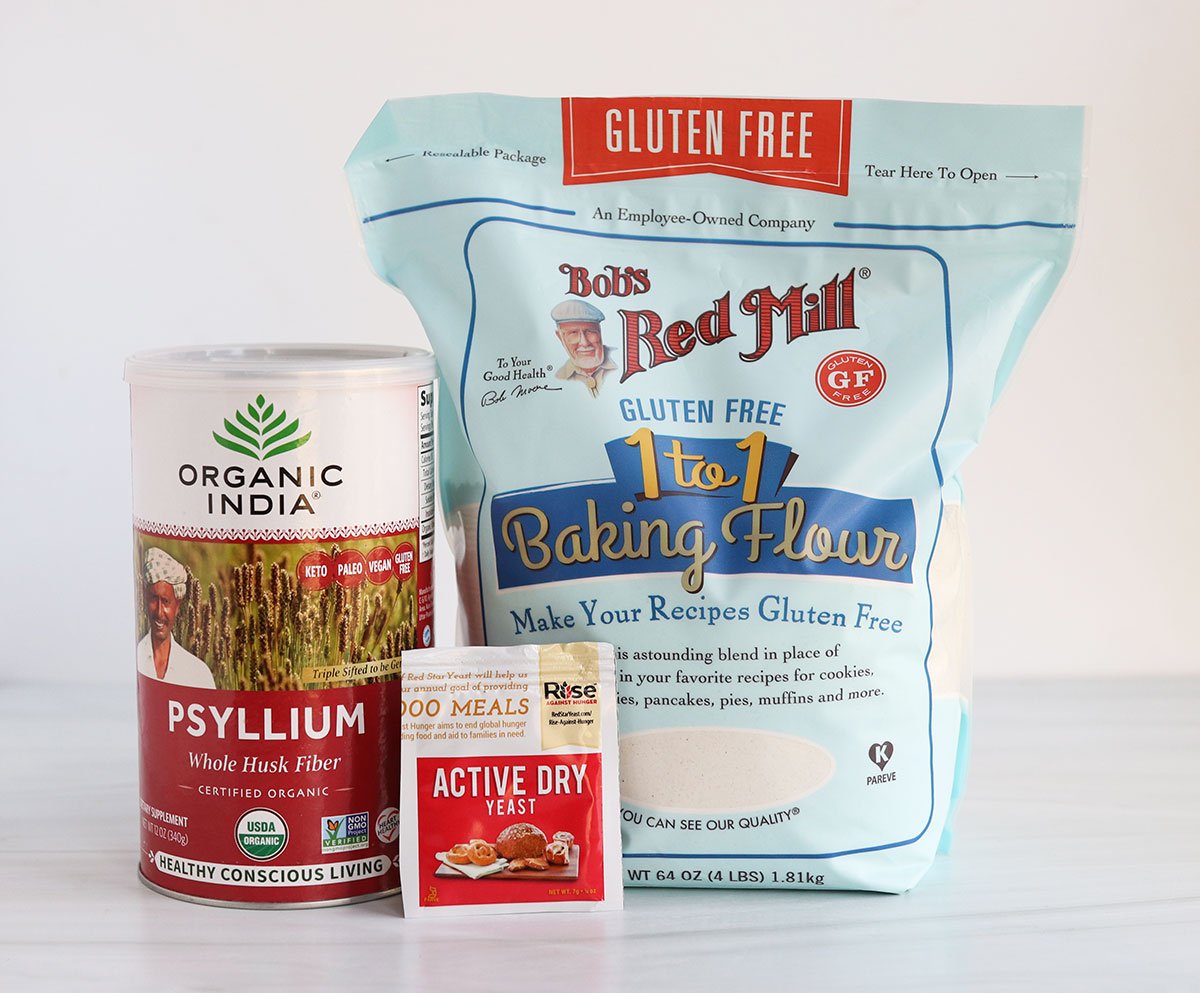
Curious about psyllium husk?
This magic ingredient will take your gluten-free baking to the next level. (It’s a common fiber supplement I stir into water most mornings.)
You can easily find this ingredient at grocery stores in the supplement section, online, or in a health food store. This recipe calls for whole psyllium husks (affiliate link), not psyllium husk powder, so check your packaging. It should look like ground flax seed, only lighter in color.
How to Make the Best Gluten-Free Cinnamon Rolls
1. Proof the yeast.
In a medium bowl, combine the very warm but not too hot water (between 105º and 115ºF is ideal), one teaspoon of sugar, and 1 (1/4 oz.) packet of yeast. (This is roughly two teaspoons, or 7 grams.)
Let the yeast mixture rest for 5 minutes. It should develop foam on top, which indicates that the yeast is good.
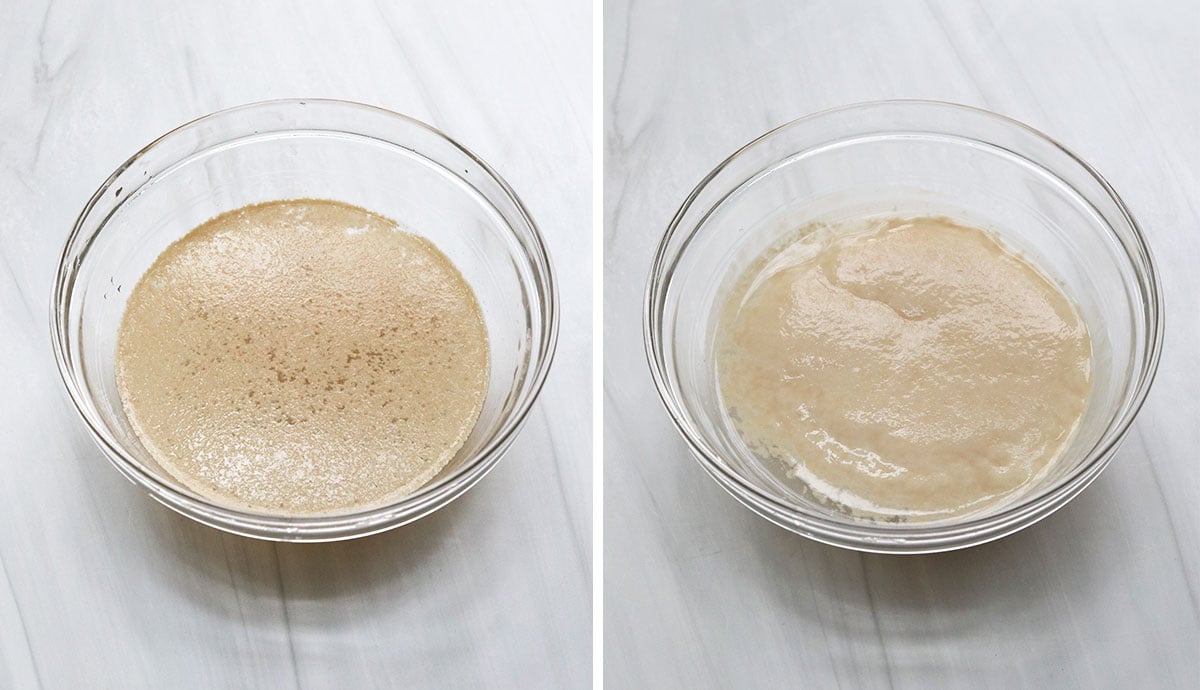
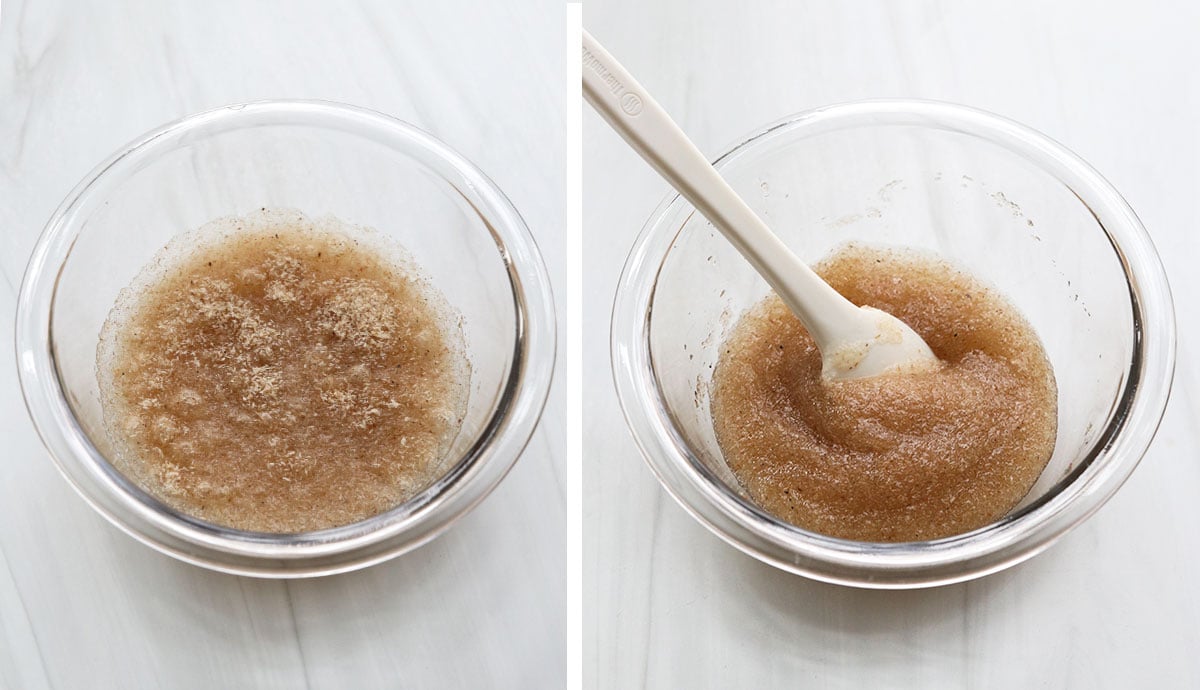
2. Mix the psyllium gel.
Combine the psyllium husks and 3/4 cup of warm water in a small bowl. Stir the mixture until it starts to thicken. If you’ve ever made a flax egg before, it will look similar but thicker after resting.
Set the bowl aside until you’re ready to add it in.
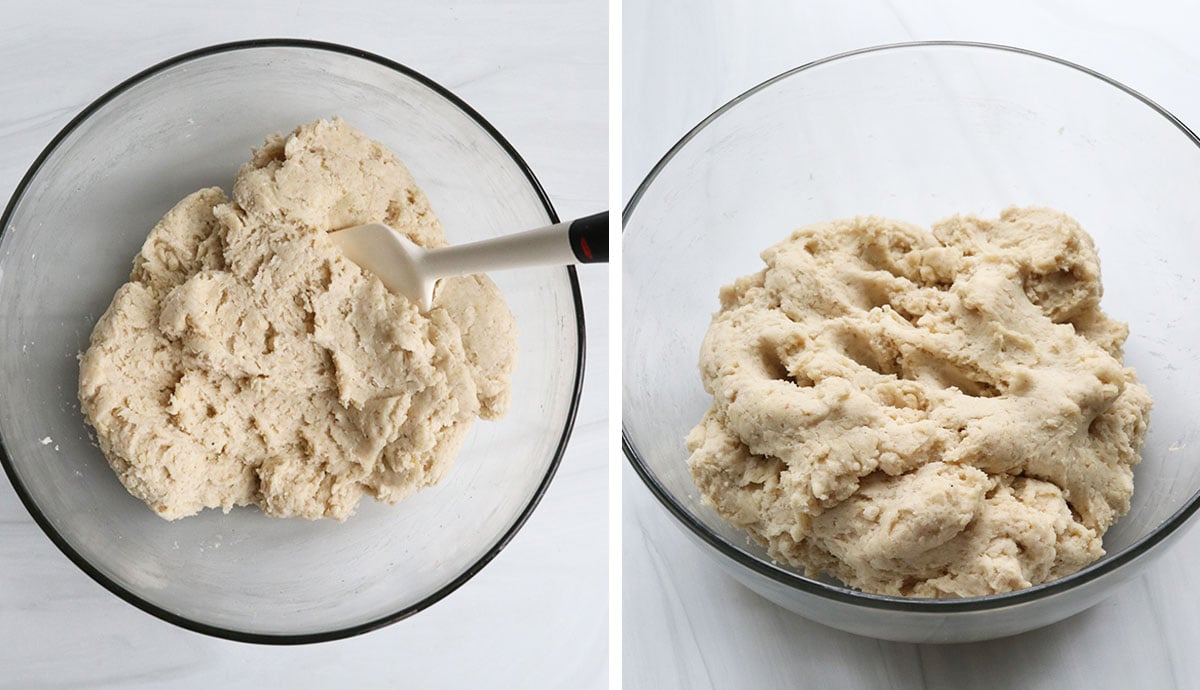
3. Mix the cinnamon roll dough.
Combine the gluten-free flour blend, sugar, baking powder, and salt in a large mixing bowl. Whisk well to combine the dry ingredients.
Next, add the egg, melted butter, and the yeast mixture once it has developed the foam on top. Stir well, then add in the psyllium mixture. It will be thick, but keep stirring until the batter looks uniform.
Gluten-free cinnamon roll dough will be slightly more moist and sticky than you might expect, but the flour will continue to absorb some of the moisture as it rests.
Transfer the bowl of dough to a warm spot to rise for 1 hour. (A “proof” setting in your oven is ideal, but you can also set the bowl on a low-heat heating pad and cover it with a towel or plastic wrap if your kitchen is cold.) The dough won’t double in size, but it should expand.
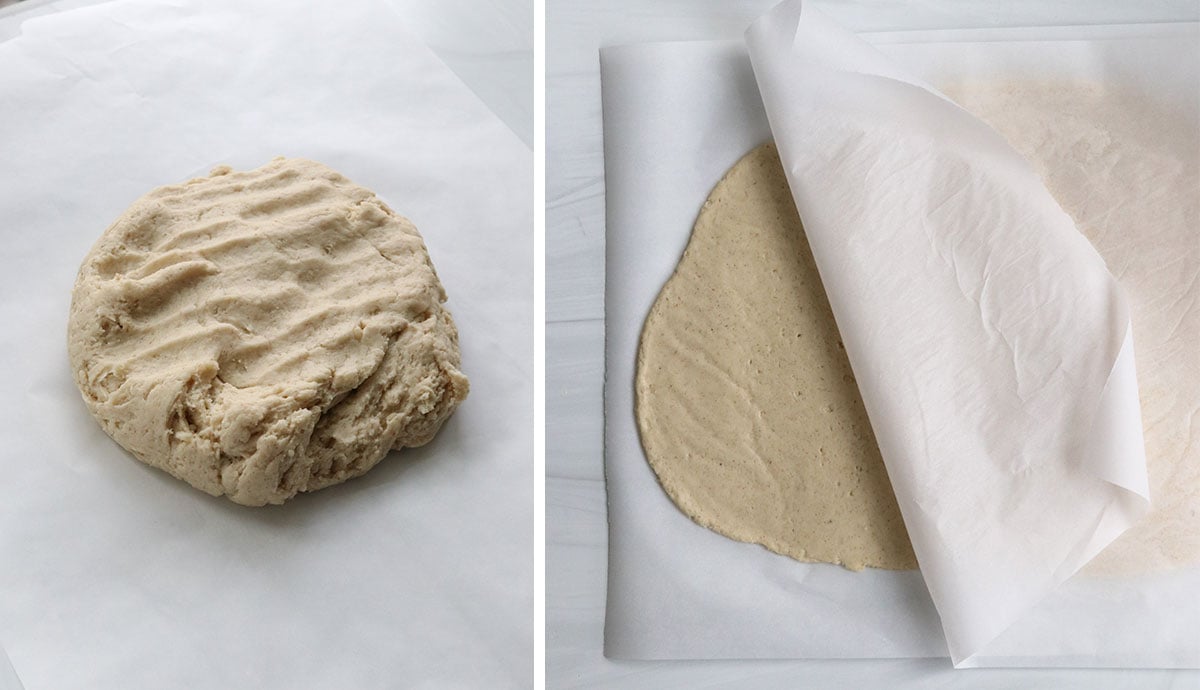
4. Roll the dough.
Once the dough has had the chance to rise, knead it to ensure it’s well-mixed directly in the bowl. The underside of the dough will be more moist than the top, so it might stick to your fingers slightly. This is okay!
Transfer the kneaded dough to the center of a large piece of parchment paper on your counter.
Cover the dough with another large piece of parchment paper, then use a rolling pin to roll the dough into a large rectangle, about 11 by 16 inches in size and 1/8 inch thick. The extra layer of parchment on top will prevent you from needing to add more flour to the recipe.
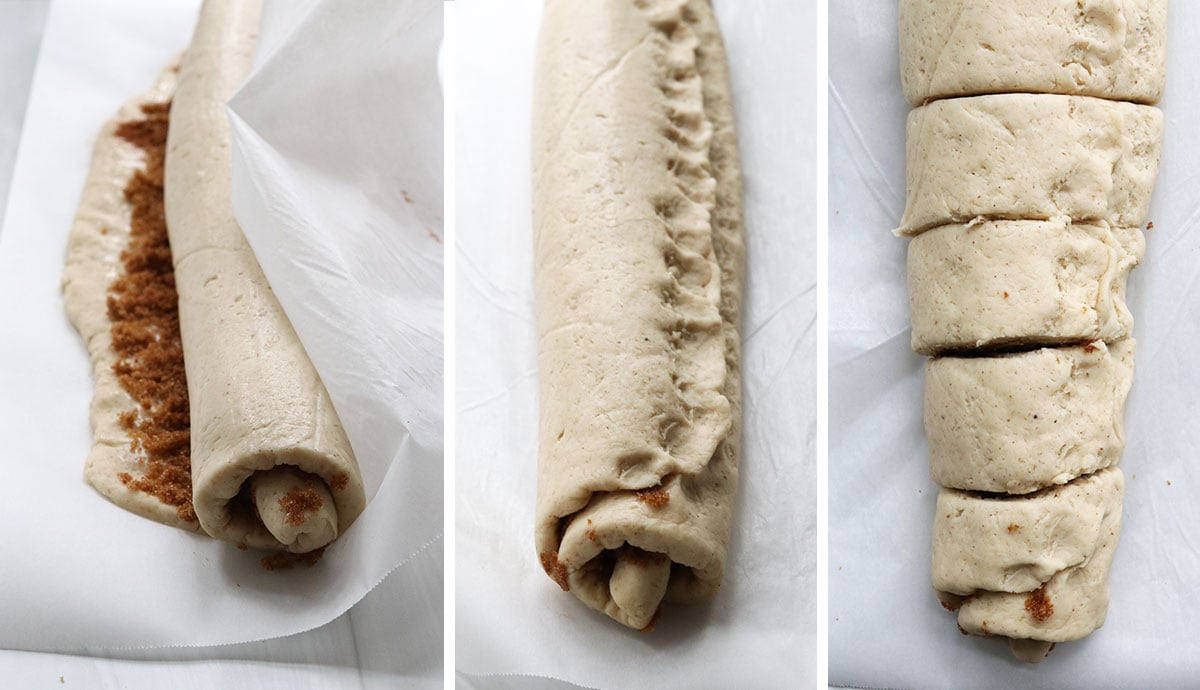
Remove the top piece of parchment paper, then pour the melted butter on top and spread it around the rectangle. Sprinkle on the brown sugar and a generous layer of cinnamon. Leave a 1/2-inch of dough at the top plain, so it will be easier to seal the roll later.
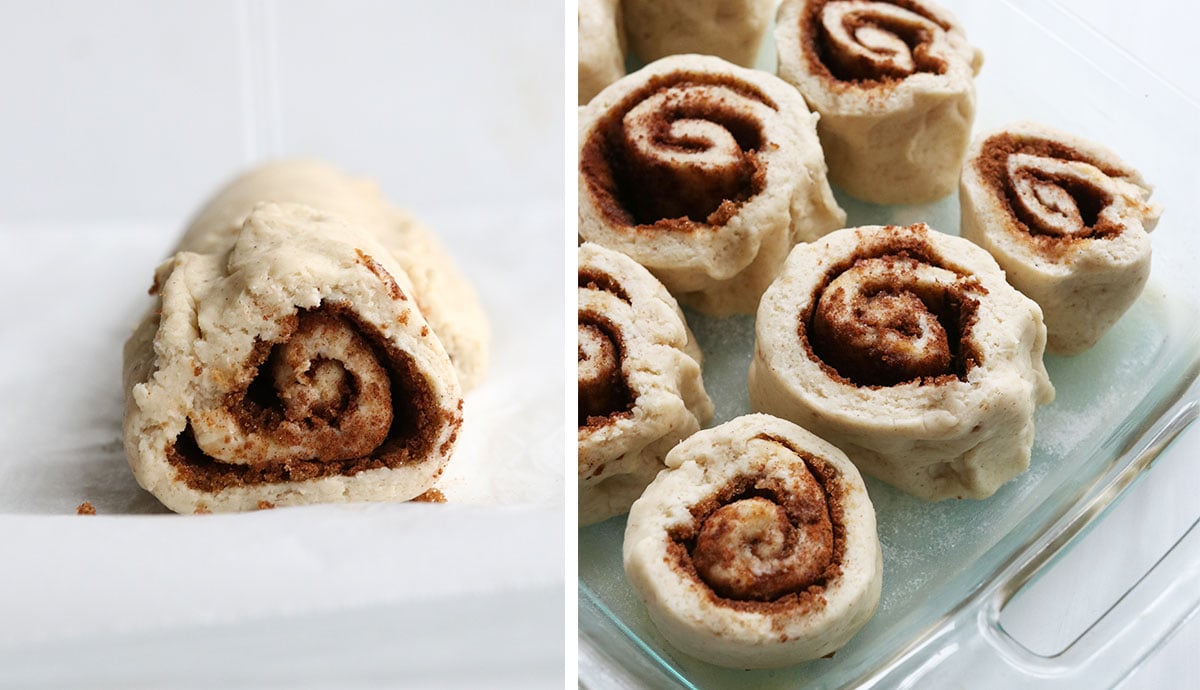
Starting at the bottom of the rectangle, lift the parchment paper with both hands and roll the dough in on itself. Gluten-free dough is relatively fragile, so using the parchment paper will keep it rolling smoothly. Continue rolling up the dough until you reach the other side.
Use your fingers to pinch the roll closed, then slice it with a sharp knife (or unflavored dental floss). This recipe should yield roughly 10 rolls.
5. Let them rise again.
Grease the bottom of a 9-by-13-inch baking pan and arrange the rolls in the pan. You can also use two 8-inch cake pans instead.
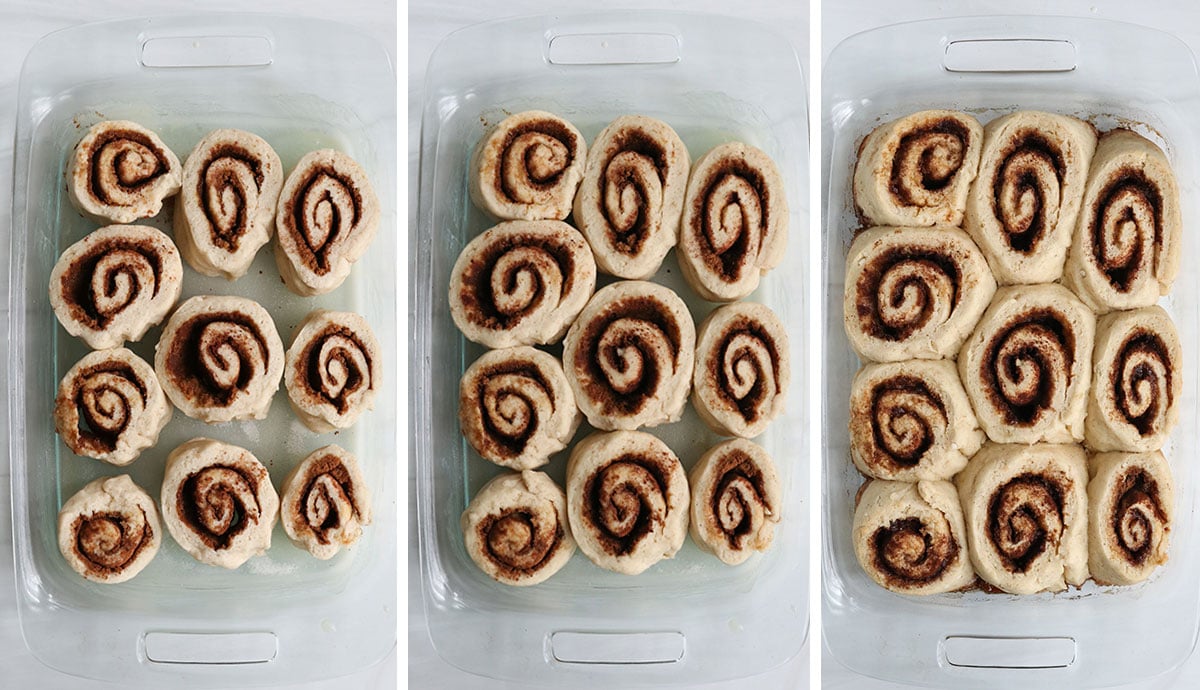
Place the pan back in the same warm spot to allow the rolls to rise for a second time, about one more hour. They should grow in size and start to fill up the pan. When you have 20 minutes left on the second rise, preheat the oven to 350ºF.
Extra-decadent Tip
Pour 3 tablespoons of melted butter into the bottom of the baking dish, making sure to grease the sides of the pan, too. Sprinkle roughly 2 to 3 tablespoons of sugar over the butter, then arrange the sliced cinnamon rolls on top. As they bake, the butter and sugar will caramelize on the bottom of the cinnamon rolls, making them extra delicious.
6. Bake.
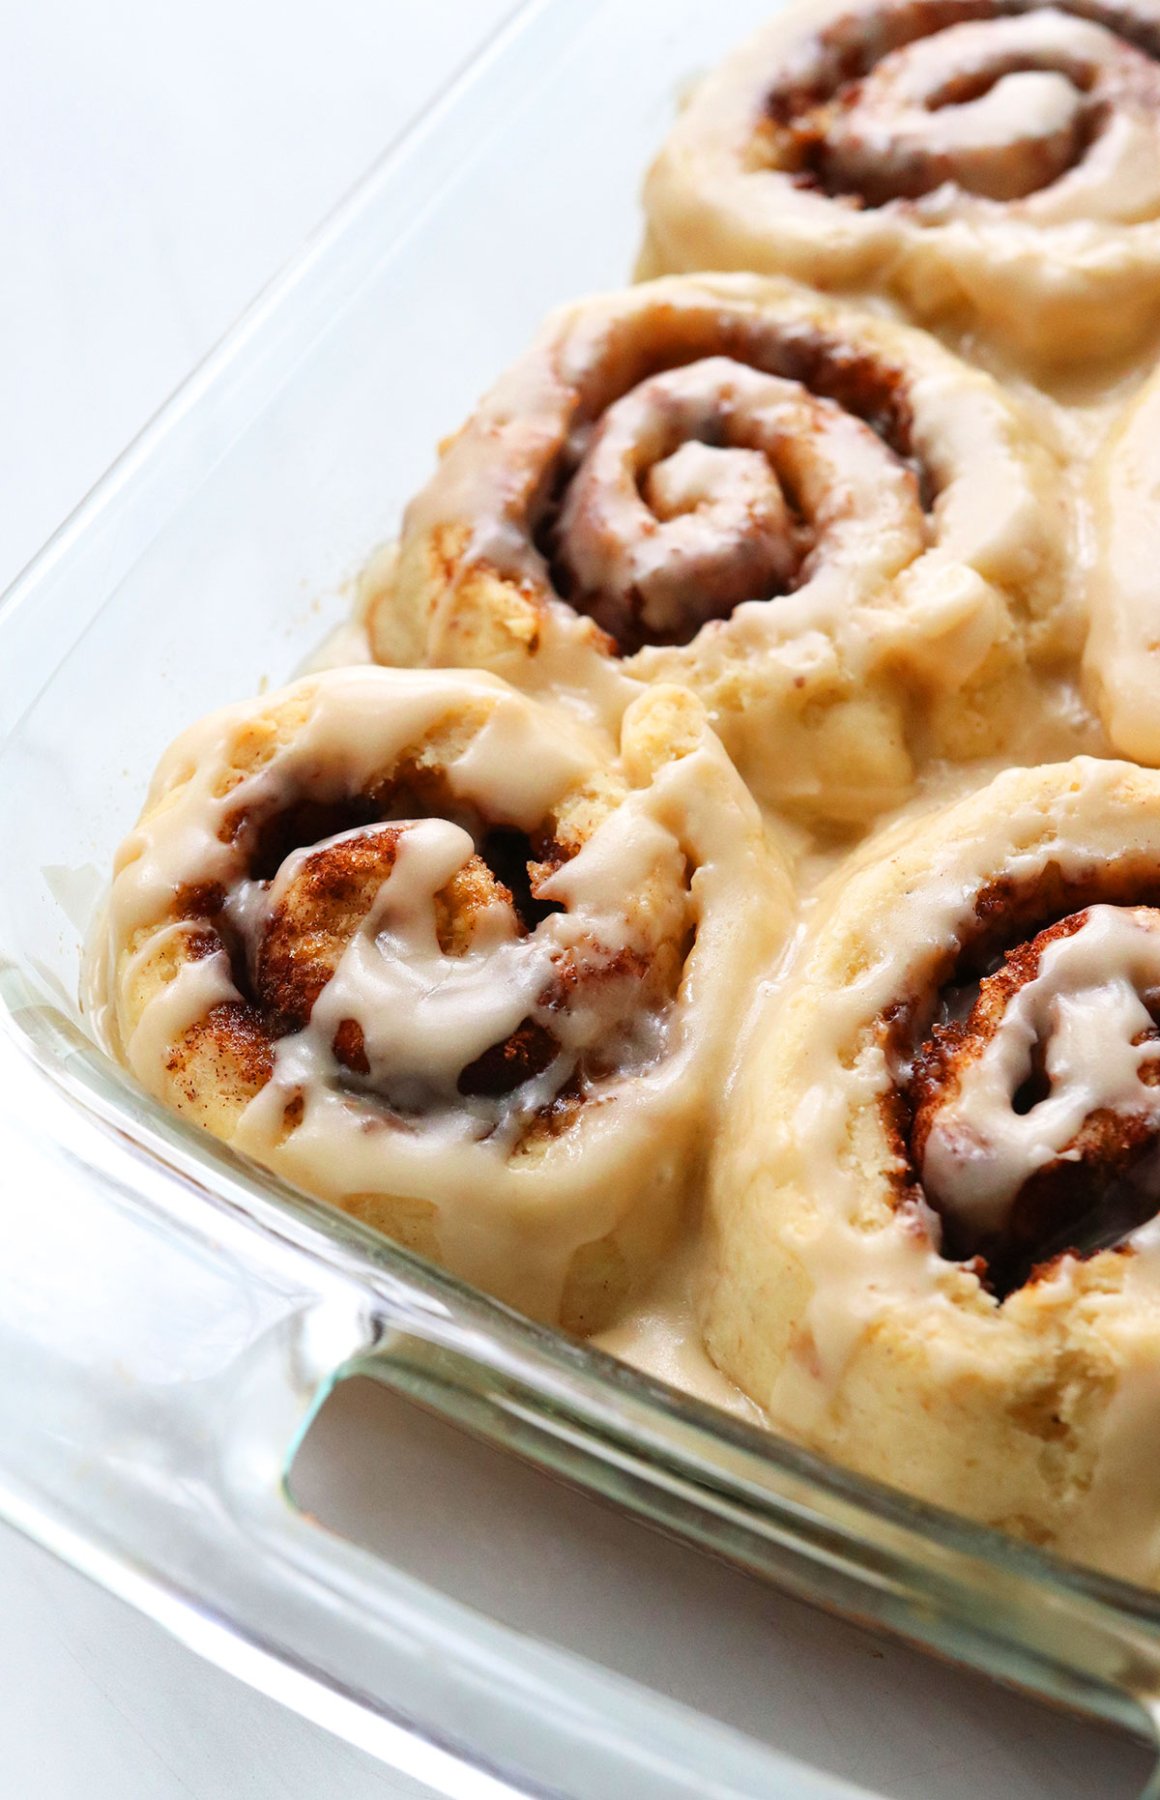
Once the rolls are done rising, bake them at 350ºF for 25 minutes, until the tops look dry. They won’t become quite as golden brown as regular gluten-containing cinnamon rolls, but they should grow in size and fill the pan as they bake.
Remove the pan from the oven and let the cinnamon buns cool for 10 minutes.
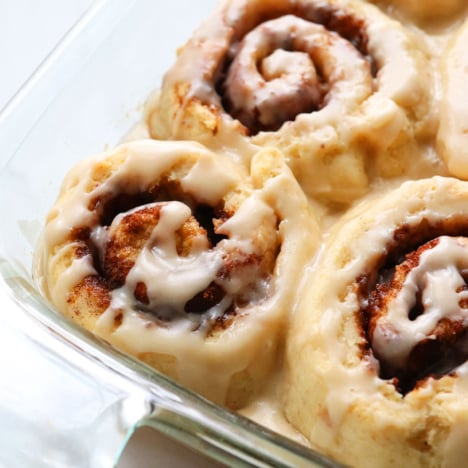
7. Frost.
While the cinnamon rolls cool, stir together the melted butter, powdered sugar, vanilla extract, and water to make a melt-in-your-mouth glaze. Or, use your favorite cream cheese frosting, or try cashew frosting for a naturally sweetened option.
Serve the cinnamon rolls right away after frosting, or let them rest until you’re ready to serve. They are delicious at room temperature, too!
Be sure to transfer them to the fridge and cover them tightly if you don’t serve them within 2 hours, though.

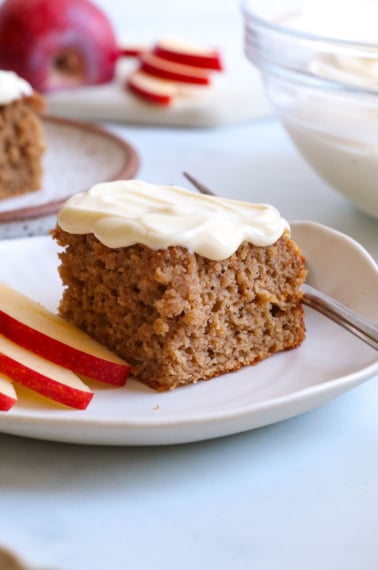
Looking for more gluten-free recipes? Try Gluten-free Pretzels, Almond Flour Cookies, Almond Flour Pizza Crust, or my favorite Oat Flour Pie Crust.
Ingredients
Cinnamon Roll Dough
- 1 cup very warm water
- 1 (¼ oz) packet active dry yeast
- 1 teaspoon sugar
- 3 tablespoons whole psyllium husk (see notes)
- 3 ½ cups Bob's Red Mill 1-to-1 gluten-free baking flour
- ½ cup sugar
- 2 teaspoons baking powder
- ¾ teaspoon fine sea salt
- 1 large egg (at room temperature)
- ½ cup melted butter
Filling
- 2 tablespoons melted butter
- ½ cup brown sugar
- 2 ½ teaspoons ground cinnamon
Caramelized Bottom of the Pan (Optional)
- 3 tablespoons melted butter
- 3 tablespoons sugar
Frosting
- 2 tablespoons melted butter
- 1 ½ cups powdered sugar
- 1 teaspoon vanilla extract
- 2 tablespoons water
Instructions
- Add 1 cup of very warm water to a medium bowl, and sprinkle in the 1 teaspoon of sugar, and the packet of yeast. Set it aside to proof, about 5 minutes. A foam should develop on top, which will let you know that the yeast is good. (If no foam develops on top after 5 to 10 minutes, you might want to try a different batch.)
- In another separate bowl, combine the 3 tablespoons of psyllium husk with an additional ¾ cup of very hot water. Stir well, and set it aside. (The husk will thicken up significantly, forming a thick gel.)
- In a large mixing bowl, combine the gluten-free flour, sugar, baking powder, and salt. Whisk well to mix the dry ingredients, then add in the egg, melted butter, and the yeast mixture, after the foam has developed on top. Add in the psyllium husk gel, and mix well, until the dough looks thick and relatively uniform.
- Place the bowl of dough in a warm place (like in an oven on a "proof" setting, or on a low-heat heating pad) to rise for 1 hour. The dough will not double in size, but it should expand.
- When the dough is finished rising, knead it in the bowl for 2 minutes. The underside of the dough will feel slightly sticky, so don't be surprised if it sticks to your fingers a bit. (Don't add more flour, though. You should be able to wipe the dough off the tips of your fingers and drop it back into the bowl.)
- Place a large piece of parchment paper on the counter, and set the dough in the center. Cover the dough with another large piece of parchment paper, so it won't stick to your rolling pin, then roll it out into a large rectangle, about 11 by 16 inches in size. (Roughly ⅛-inch thick.)
- Add the filling to the rectangle, leaving about a ½-inch at the top untouched, so it will be easy to seal the roll later. Spread on the melted butter first, then sprinkle the brown sugar and cinnamon evenly over that. Use the parchment paper under the dough to help roll it up into a long log, starting with the bottom (longest side) of the rectangle and moving your way up to the top. The parchment paper will prevent the dough from breaking as you roll. Once you reach the top, pinch the roll closed at the seam. Cut the log into 10 equal pieces.
- Prepare a 9-inch by 13-inch baking dish by spraying it with oil. Optional: Create a caramelized bottom by spreading 3 tablespoons of melted butter into the bottom of the pan. Sprinkle 3 tablespoons of sugar over the butter, then arrange the cinnamon rolls on top of the sugar, in a single layer in the pan. The butter and sugar on the bottom will caramelize as the cinnamon rolls bake, creating a delicious bottom side to the rolls. Place the pan back in a warm spot to rise for 1 more hour. The cinnamon rolls should grow in size, but not necessarily double.
- Preheat the oven to 350ºF for at least 20 minutes in advance, so the oven comes to the proper temperature. When the cinnamon rolls are done with the second rise, place them in the preheated oven to bake for 25 minutes. Gluten-free rolls don't brown the same way gluten flour does, so they won't be golden brown, but they should feel dry to the touch and spread to fill the pan. Remove them from the oven and let them cool for at least 10 minutes while you mix the frosting together.
- To prepare the frosting, combine the melted butter, powdered sugar, vanilla, and water. Stir well, until the frosting looks smooth. You can add an additional teaspoon of water, if needed, to thin out the texture. Spread the frosting over the warm cinnamon rolls, then they are ready to serve. Leftovers can be stored in an airtight container in the fridge for up to 5 days.
Notes
Nutrition
If you try this gluten-free cinnamon roll recipe, please leave a comment and star rating below letting me know how you like them.


These are unbelievable! I made them ahead and refrigerated them overnight before cutting them. There was so much liquid on the parchment I wrapped the roll in and I was afraid they would be dry but these turned out amazing. I would only expect them to be better if baked same day. These made me so incredibly happy as I’ve not had cinnamon rolls in probably over a year since being gluten free. I would love to experiment with the psyllium husk for other recipes, the real powerhouse of this recipe!
Just made these on Christmas Eve, and they are WONDERFUL! Thank you Megan! I always trust your recipes and this one blows my mind. The texture, the flavor, the sweetness – all are perfect. I usually reduce sugar in recipes but used exactly what you recommended and it’s spot on – not too sweet – just right, even with all of the icing added. I added chopped pecans to the filling and will add a lot more next time I make these. I had time to work on other things during the raising times so the total time commitment didn’t seem overwhelming.
These really are the best cinnamon rolls! A little time consuming but well worth it!
Thank you! This sounds SO yummy and perfect for a cold winter morning!